Walkthrough - X18Last modified: 15/7/2010 20:28:04 CET
Table of content
Table of contentMission: Find the documents in the underground lab, continued
Table of contentMiddle floor
Table of contentBottom floor
Table of contentDark Valley
Table of contentCordon
Table of contentBar
Mission: Find the documents in the underground lab, continuedBack to top
Map of X18 (Click to view large version)
Map of X18
Since X18 consist of three different floors, finding your way around can difficult, especially since the minimap shows the layout of all three floors in the same, flat image. I have created a custom map, though, that shows each individual floor - hopefully that may help you find your way; the map also includes a few obstacles that can be found ingame, so it may be easier to pinpoint your exact location using those.

X18 has Poltergeists roaming around, so watch out for crates, paint cans, and other things they may hurl at you; for now there is little you can do about it, except try to watch your back and break anything that can be broken to prevent these items from being used against you.

The starting point is on the top floor of X18. You'll be able to find a dead stalker close by and once you've looted him head down the stairs to the north (taking you down to the middle floor).

Middle floorBack to top
Once you are on the middle floor you should be able to see a door to the southeast (door #1) - approach it and you'll be given a new task: find the code to the door. Both the door and the location of the keycode will be added to your map. Even though you may have played the game before (and therefore already know the code) you won't be able to open the door until you physically locate the code.

You can find an artifact behind the Fruit Punch anomaly. (Click to view large version)
You can find an artifact behind the Fruit Punch anomaly.
Before you go after the code, move into the room to the east, beyond the door; in there you should be able to find two artifacts (Slug and Droplets) along with some antirads in the opposite corner of the Fruit Punch anomaly. Once you've taken all the items head out of the room and go north; you should spot a small passageway with two close doorways; there also a Whirligig anomaly located in a hole in the wall. Head to the north-east doorway. There you'll find a room filled with lockers (the middle floor locker room on the map); some of them contain goodies so be sure to go through them all. Notable items include a Monolith Suit and an Akm 74/2 with a GP-25 Kostyer Grenade Launcher attached to it. The Monolith Suit is superior to the Stalker Suit you're likely still wearing, so be sure to pick it up. The Merc Suit doesn't have nightvision however, you may wish to hold onto your Stalker Suit for a while.

Opposite the locker room, on the other side of the wall with the anomaly in it, you'll be able to find some artifacts; you can find a Wrenched down the small set of stairs and a second artifact (which seems to be random) can sometimes be found in the wooden crate underneath the stairs.
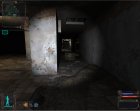
Hallway with burner Anomalies (Click to view large version)
Hallway with burner Anomalies
Move out of the room and back into the room with the locked door. Move through the first doorway to the east and you'll come to a room with a hallway leading towards the north; as you may be able to see, the hallway has some Burner anomalies in it so be careful when you approach (use bolts to accurately pinpoint them). Also, once you get close enough two snorks will appear at the end of the hallway - they may attack you, so again be careful.

On the right side of the hallway you'll spot another room; inside you'll see something resembling a burner anomaly floating around the room. Inside the room you can usually find some Droplets and a dead stalker. Watch the pattern of how the "anomaly" moves around and sprint inside when you've got a clear path. Loot the dead stalker and pick up any nearby artifacts.

Once you reach the end of the hallway you should be real close to the marker on your map; inside a small room to the east you'll find a body of a scientists. Be sure to avoid the burner anomalies. Once you search his body you'll hear a voice message providing you with the code for the door: 1243. Just next to this room you'll find a toilet with an antirad in the sink.

Time to backtrack back to the room with the locked door. Once you're there, enter the code and head through the door and down the stairs to the bottom floor.

Bottom floorBack to top
This is a Poltergeist - shoot it! (Click to view large version)
This is a Poltergeist - shoot it!
Once down, head inside the room and to the east - approach the door ahead (door #2) and you'll be given another keycode hunt. Fortunately, the location of the code will again be marked on your map (it's further to the north). The area ahead is filled with Poltergeists (about 6 or 7) so you're likely to be bombarded with various items. Make sure you deal with any Poltergeists you come upon to end their constant battering.

In the south-west part of the floor you'll also come across a room with some lockers in it; two of them has a metal box inside containing some bandages and some ammo. Connected to that is another room that has has a blue box stash in the far corner, containing more goodies.

Further north you'll come up a small room with some stairs going down; you'll be able to find the keycode down this area, but take care when you move down - you're about to run into a Pseudogiant; while they aren't really that tough, their stomping attacks can be pretty brutal if you get too close. In the north-eastern part of the room you'll find another body of a scientists that will reveal the code to the second door: 9524. Before you leave, check out the small alcove in the south-east part of the room (it has stairs leading up to it); there you can find a blue box stash and a metal box both containing some goodies, along with a picture of the development team behind S.T.A.L.K.E.R.: Shadow of Chernobyl.

Cutscene from X18. (Click to view large version)
Video Cutscene from X18.
Backtrack to the door and open it. Before you move on, be aware that there is a special type of enemy ahead - it has a close resemblance to a Poltergeist (except it's red) and rather than using telekinesis to throw things at you it seems to summon columns of fire and shoot them at you. When you enter the area, the door will close behind you - you must kill the "poltergeist" for the door to open; once you do kill it, you'll pass out and a cutscene will follow.

When you wake up again you'll hear a transmission - it seems that soldiers have moved in on the perimeter so expect resistance when you backtrack to the entrance of X18. You'll encounter the first soldier at the top of the stairs leading from the middle floor down to the bottom floor. You'll find the documents in a room upstairs to the west. Grab them and head down again. Before you start to head back towards the entrance to X18 be sure to head up the ramp to the east - you can find a number of goodies in some cupboards up there.

If you are lucky you may have a secret stash marker on your map in X18 - this will lead you to a room with a safe in it. If you have found the stash (ie. the icon is located on your map) you'll be able to find a Monolith Suit and a Night Star artifact - two very nice items in their own right.

Dark ValleyBack to top
The path to Garbage has been cut off by soldiers so you need to head south and into Cordon instead, back to Sidorovich. Before you can do so, though, you'll need to get out of the facility which is now surrounded and inhabited by bandits and soldiers alike. You can stay and fight it out if you'd like, or you can simply try to head directly for the front gate and avoid any confrontation. Once you've run away or dealt with the opposition, head south, through the closed gate, and into Cordon. Although your arrow now points towards the entrance to Garbage, you may wish to head back to Sidorovich first. If you do he'll give you 1000 RU for bringing the documents to him - don't worry, he won't keep them so you can still deliver them safely to the Barkeep. You can also pick up a special mission from him - he wants you to go to the nearby military control point (to the south) and steal a box. There's a mere 2000 RU in it for you so you may wish to pass.

You can also pick up an optional mission from Fanatic, a stalker that has taken the place as leader of the rookie camp since Wolf left. Some Mercs came by recently and it looks like they're going to be back soon - Fanatic wants you to help him and the other stalkers setup an ambush and take down the Mercs. If you succeed, Fanatic will reward you with 2500 RU. Even if you decide not to do the mission the Mercs will still approach the camp, so you may as well pick up the mission and get a reward for helping out; I reckon you can also just head towards the Bar and leave the rookie camp to deal with the Mercs on their own.

Once you're done at the rookie camp proceed north to the Bar and deliver the documents to the Barkeep. He'll give you 10,000 RU for them which is a nice bonus for your trouble. Your next primary mission is to head into Yantar and turn off the Brain Scorcher. The Barkeep tells you to seek out the scientists at Yantar since they may have more useful information. To get to Yantar you'll first need to head into the Wild Territory. Before you head off you may wish to pick one optional mission - it's given by Hunter and he will ask you to retrieve his family rifle which can be found in the Wild Territory.

© 2007-2025 Dawnrazor - - @dawnrazor73