|
The Army Warehouses area is a pretty large area dominated by a a Duty outpost, a village, the Freedom headquarters along with the border outpost. As explained on the previous page there are plenty of optional missions to do here, and you can pick up even more from Lukash at the Freedom HQ if you wish. Some of the areas are populated by landmines so watch out for signs indicating this.
As soon as you enter the Army Warehouses area you'll notice three neutrals on your minimap; these are members of the Freedom faction, and they're about to be ambushed by Duty members. Your best bet is simply to stay out of it - just wait until the three guys are dead and then move forward.
You can talk to Borya Robin who tells you to follow them and talk to their commander if you're looking for work. This basically leads to another optional mission, and one that will ruin your relationship with Freedom completely - so only do this if you've got no qualms with that, or possibly after you've done all the missions available from various members of Freedom. Lukash at the Freedom HQ can give you sort of the opposite mission where you'll have to assist Freedom members in taking down everyone at the Duty outpost - this mission, on the other hand, won't ruin your relationship with Duty as far as I know. My status with Duty before doing the mission was friendly, and it stayed that way after I completed the mission and returned to the Bar area.
Before you continue on with the optional missions you may wish to give a short visit to the Duty outpost that is located east/north-east of the entrance from the Bar area. It consists of a number of houses and inside one of them you'll be able to find some grenades and some vodka bottles behind a ... On a couch, inside the same building you can also find a Wind of Freedom Suit sitting on a couch. Inside the barn you can find two ladders - one of them leads up to a small collection of items including some medkits, a Bandit Jacket and an Akm 74/2U.
The following three sections are very different and especially the two first are mutually exclusive. The third one describes how you can gain access to the Freedom without becoming enemies with them.
As mentioned above, this mission can be picked up from Lukash if you tell him about the Duty outpost located nearby. If you accept the mission, he'll tell you to meet up with Max. When you head back outside you should see a number of Freedom members gathering close to the bridge. Once they've gathered they'll head towards the outpost; follow them and help them eradicate all the Duty members. Once you've done that you'll be prompted to return to Lukash. When you do, he'll give you another assignment: Deal with the snitch. He'll inform you that there is a snitch in their ranks and he wants you to take care of him. He can be found near the farmstead to the north of the Army Warehouses so make your way there. When you arrive the mission will be updated and you'll now have to wait for the snitch to bring out his agent. The snitch will move inside one of the buildings and soon the mission should be updated again - you now have to deal with the snitch first and then the agent; the agent won't (probably) have arrived yet, so you may have to wait a while for him to approach. He'll be moving in from the west, and he'll be accompanied by 3 Mercs so find a good place with some cover and take them down as they approach. Once you've dealt with the agent you'll be prompted to return to Lukash. While you are at the farmstead you may with to step inside the house where you can find a metal box with some goodies inside; another metal box can be found in the barn, up one of the ladders. When you return to Lukash he'll reward you with a measely 7000 RU; however as a side-bonus for doing the missions, Skinflint will now offer more and better equipment. The last mission in the series is to help Cap protect the border area from an incoming wave of Monolith soldiers. You'll automatically get this mission when you approach the border area, if you don't pick it up from Lukash. Refer to this section for a description of this mission.
If you talk to Skull at the Duty outpost he'll tell you that they're here on a mission, and he asks if you would like to join them. This and the following missions basically requires you, with the help of the Duty members, to eradicate everyone at the Freedom base. Your main targets will be the snipers and Lukash. The first mission is to deal with the sniper east of the outpost. Once you've killed him, Skull will call you back for a reward and further instructions. He'll give you 4000 RU and you can now pick up the next mission: Kill Lukash. This mission requires you to take care of more snipers and the ultimate goal, to kill Lukash. This mission can be tricky, not only because you'll have to deal with the entire Freedom base (albeit with help from the Duty members), but also because Skull will be part of the group moving in - and if he dies, you won't be able to collect your reward for completing the mission. I suggest that immediately after getting the mission that you sprint to the base entrance on the northern side of the compound - and start taking down every single Freedom member in sight; if you stay with the Duty members you'll have to wait for them to blow a hole in the wall after which they'll move in - this takes precious time you could have spent by taking down enemies. Slowly move into the base, dealing with any enemies as fast as possible. By doing so, you'll likely have killed most of the enemies before the Duty members make their way in, thereby reducing the chance of Skull getting killed during the raid. If he should die, though, it's not a huge loss since he'll only give you 8000 RU as a reward. However, either way it turns out you can now freely loot the entire base, including the armory - and alot of the dead bodies are likely to reveal information about a few hidden stashes as well.
There are many ways to gain access to the armory in the Freedom headquarters. The most obvious one is simply to gun down the guard thus making a forced entry. However, if you don't do this in a stealthy fashion, you're likely to get the entire Freedom faction on your back. A different approach still means that the guard will die, but you wont get blamed for it. Use the "red barrel trick" on him - refer to this page for information on how this works. Getting the barrels up the stairs can be very tricky (read: it'll drive you crazy), but it can be done. There is a third and much easier approach though - use one of the chairs nearby to simply "jump" over the guard near the armory - refer to this page for more information about how to do it.
First let's take care of your optional missions. Both stalkers that you are supposed to kill are at the stalker camp to the north-east, so head in that direction first. The master stalker is in fact nicknamed "Master" - he's wearing an Exoskeleton suit so be sure, as always, to aim for the head. The traitor stalker is called "Smartass". There should be about 5 stalkers in the area, and they're all likely to go hostile when you attack any of them. Once you've dealt with the be sure to loot their bodies for goodies - you should should be able to find a total of 3 unique weapons: the Lightened IL 86, the Balance IL 86 and the Combat Chaser. There is a blue box stash inside an old caravan at the camp, so you may wish to stick some of your loot there since you'll need to have at least 9 kilos left of carrying capacity for the weapons that Voronin wants.
Next up it's time to get rid of some bloodsuckers. West of the stalker camp you can find a small village, often referred to as the Bloodsucker village. Head there - use the road and you'll soon come upon 3 Freedom members (who should still be neutral, btw.). Go talk to Murk; he'll let you in on a small surprise - the village is filled with Bloodsuckers and he basically wants you to take them down. You might as well accept because you'll need to get to the northern part of the village to deal with a specific bloodsucker, and dealing with the other bloodsuckers is almost a natural part of the process.
Most of the bloodsuckers are located in various houses in the village (all boarded up). Usually they'll notice you before you notice them, and come charging at you. There should be about three in the buidlings. The final two bloodsuckers can be found near the tower to the north-east. Once you've killed them all, both the Kill the bloodsuckers in the village and Destroy the lair of the bloodsucker missions should be updated. If either of them isn't be sure to search around the tower and the village for the remaining one(s).
While you're at the tower you may as well get your hands on some more neat stuff; start off by looting the two corpses then head into the tower and up the stairs. At the top you'll be able to find a few items, most noteworthy a Spring artifact.
Before you return for your rewards though, proceed further north to the north-western corner of the Army Warehouses. There you'll find a number of Mercs - they have the weapon, the enhanced rifle, that General Voronin is looking for. Take them down, search the area and you should come upon a Sniper TRs 301, another unique weapon; usually you can find the weapon on a table, but I have also seen one of the Mercs use the weapon. Near the table you'll find a metal box containing some 5.56x45 mm AP rounds. Loot everything you want or need. You can also find more metal boxes near the fire that contain some more goodies.
On your way back through the village it's time to scoop up the second weapon for Voronin. As I mentioned earlier, you can obtain the Bulldog 6 without having to steal it from the Freedom faction. You can find another Bulldog 6 in the Bloodsucker Village and Voronin will gladly accept that instead. If you follow the road back through the village, stop when you reach the old tractor. The Bulldog is close by - in a cellar of one of the nearby houses; refer to this page for the instructions on where to find it. Once you pick it up, the mission will be updated and you'll be prompted to return it to General Voronin.
In the south-western part of the Bloodsucker village you can find a tree with some rocks and a fire near it. Behind the fire, close to the tree, you can find a Stalker suit. I rarely bother to pick it up, though, since you're likely to be wearing a better armor, and at this point you're at the edge of your carrying capacity.
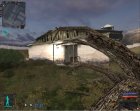
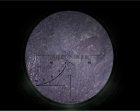
Once you have it, you've basically dealt with all the optional missions from the Bar and the one given by Murk. Return to him and he'll tell you to go see Skinflint at the Freedom HQ. If you do, Skinflint will reward you with a Crystal artifact for your work. While you're at the headquarters you may wish to enter one of the barracks where you'll be able to find a Vintar BC sniper rifle - an excellent weapon that should serve you well. Refer to the screenshot on the right for the location of the rifle. To the south of the barracks you can find a collection of Freedom members along with Max. Near him is a blue box stash containing 2 TRs 301 assault rifles along with 30 rounds of 5.56x45 ammo. Refer to the screenshot on the left for the location.
Head back to the Bar for your well-deserved rewards. Baldy will give you a Night Star artifact, Snitch a Mama's Beads artifact and Hunter will give you a Battery artifact. Voronin will give you a Vintar BC and 60 9x39 mm SP-5 rounds for the enhanced rifle and a PSZ-9Md Universal Protection suit for the Bulldog 6. If you picked up the Vintar from the barracks, you should now have two of these powerful rifles. In this case I suggest that you bring along one of them as you head back into Army Warehouses - it packs a serious punch and the scope has a better zoom than most (if not all) of the assault rifles; another advantage is that it uses the now more common 9x39 mm rounds.
Lukash can also provide you with optional missions. I wont go into detail about them but just mention a few of them including what rewards they'll bring - for a complete list of missions, please refer to this page. The Destroy the herd of boars and fleshes simply requires you to kill some boars (and possibly fleshes) to the north of the headquarters; Lukash will give you 3000 RU and 90 5.56x45 mm AP rounds along with two M209 grenades as a reward. The mission can tie in well with another mission, namely Bring a boar's leg which will net you 1000 RU and a bottle of vodka. Finally the Bring the bulletproof vest requires you to bring him the Healing Beril that you found near the entrance to X16 in Yantar - he'll give you a Guardian of Freedom suit - not a bad exchange if you ask me.
When you get close to the border (aka. the barrier) you'll receive a new mission: Assist at Freedom's Barrier outpost. Go talk to the leader there, Cap, and he'll inform you that Monolith members are moving into the perimeter and he wants you to help him and the other Freedom members to fend off the next wave. Please notice that you'll fail the mission if Cap dies.
Move down to the road and find a good, defensive position; the tower can be an excellent spot, but you're somewhat prone since it doesn't offer any kind of protection. Monolith soldiers will soon arrive from direction of the Red Forest. There'll be about 14-16 of them, but they wont all come at the same time, though. Once you've defeated most of them, the mission will be updated and you are prompted to talk to Cap. Make sure that all the Monolith are dead before you do, though. When you talk to him, he'll give you 2500 RU as thanks for your assistance. Be sure to loot all the bodies, including any Freedom members that may have dropped during the battle - most of them carry the excellent GP 37 assault rifle.
During or after the battle you may receive another mission: Protect border, given by Lukash. I am not entirely sure who you're supposed to protect border (aka. the barrier) from (perhaps it's the last Monolith soldiers that are not part of the previous mission), but you'll usually complete the first goal automatically if you move into the Red Forest area. If you wish to pick up the mission reward right away, in this case, then head back to Lukash in Army Warehouses; Lukash will give you 5000 RU and an Urchin artifact.
Before you move into the Red Forest be sure to bring along a good scoped rifle (eg. GP 37 or the Vintar BC), along with a decent amount of ammo - if you're bringing the Vintar you should probably have about 400 rounds with you, just to make sure... for the GP you need less because alot of the Monolith soldiers will be using weapons that utilize the same type of ammo as the GP. Also be sure to bring some antirads (or powerful antiradiation enhancements), or both. Once you're finally ready to move on, head into the Red Forest area.
|



 - @dawnrazor73