| Walkthrough - X16 | Last modified: 15/7/2010 20:28:04 CET |
| Table of content |
 Turning off the psi-emissions Turning off the psi-emissions |
 Getting out of X16 Getting out of X16 |
 The Bar The Bar |
 Mission: Meet the Guide & Meet with Doctor Mission: Meet the Guide & Meet with Doctor |
 Map of X16 |
You'll soon come to a room with an alcove to the south-west and with more zombies and another Snork in it; once you've dealt with them be sure to break all the boxes in the alcove since one of them contains some 9x39 mm SP-6 rounds. Moving north you'll find another room with alot of shelves in it - you can find a number of metal boxes on them - be sure to check them all since they'll turn up more 9x39 mm ammo and some other goodies.
| Turning off the psi-emissions | Back to top |
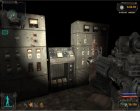
 Turn off these switches and the emissions will stop! |
 Location of the Berill-5M. |
On your way through the room be sure to be on the lookout for anomalies, artifacts (there's a bundle about), items, and of course enemies. You don't have to pick up everything at first since you can explore the room once you've turned off the emissions, so stick to that objective if you run low on time. The final switch is all the way at the top. Notable items, beyond the large number of artifacts, includes a Berill-5M Armored Suit and close by a crate with a SSP-99 Ecologist suit in it; since you're probably pretty much loaded I would recommend ignoring the latter, although the first armor may be worth dragging along.
 |
As you may have notice I called Meet the Guide semi-optional - it is an optional mission in the sense that you don't have to complete it, but for you to fully explore the plot and gain access to the "best" endings of the game, you must complete it.
Although the arrow on your minimap may seem to indicate that you should backtrack towards where you initially started out, you actually need to drop down a hole close to where you discovered Ghost; it's inside one of the "cells" with a sign (saying "10") in front of it. Before you move on, though, you may wish to search the room thoroughly - you can find some boxes, one of which contains a M209 grenade. Before you drop down make sure that you have everything with you that you wish to bring along, because once you drop down there you're not likely to come back.
| Getting out of X16 | Back to top |
 Be sure to search these boxes. |
I'm sure you'll be thrilled to hear that the tunnel not only has zombie stalkers and Snorks in them, but also a Pseudogiant. You'll hear what appears to be gunfire and explosions - you'll soon find out that it's in fact military choppers that has been sent in to deal with the zombie stalkers. Finally some justice for the little guy... or something.
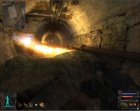
 Jump onto the pipe and move across to avoid the flame. |
Go and talk to Sakharov who will basically thank you for turning off the psi-emissions. Strangely, he'll give you an optional mission: Purge the lair of the snorks; the reward for this mission is 3000 RU and two scientific first aid kits, so if you need some cash feel free to do it. Notice that Sakharov now has a wider assortment of equipment available, including the Tunder S14 assault rifle, the SEVA Suit, and 9x39 mm PAB-9 rounds. He may not have all the items when you visit him since his inventory seems to be randomly generated each time you enter the area - so you can always try to head into the Wild Territory and come back to check his inventory. If you decided to pick up the Bring the unique bodysuit (or you pick it up now) you can give the Ghost Suit to Sakharov; he'll reward you with a SSP-99M Suit, the armor with the highest protection average in the game - in other words a pretty good armor.
You're not going to come back to Yantar unless you need to buy equipment from Sakharov or possibly to complete an optional mission - in any case, you should bring as much loot as you can carry with you back to your central stash at the Bar since your next destinations are going to be the Army Warehouses and beyond.
| The Bar | Back to top |
He also informs you that the leader of Duty, General Voronin, is looking for someone to carry out an assignment at the Army Warehouses. Since your next stop is the Army Warehouses you may as well visit him and pick up the mission. Snitch has the Kill master stalker mission and Baldy wants you to take care of a traitor. Finally your old friend, Hunter, has Destroy the lair of the bloodsucker. All these missions take place in Army Warehouses so you may as well pick them up - also because the first two missions will provide you with three unique weapons.
The Duty HQ is located to the north-east of the 100 Rads. There is a control point just outside it, but if you talk to the guards there you can tell them that the Barkeep sent you, and they'll let you pass.
Inside the HQ you can find General Voronin. Talk to him and he'll explain how Duty basically is at war with the Freedom faction. He wants you to steal a weapon from them, namely a Bulldog 6 grenade launcher. Don't worry if you wish to be on good standings with Freedom because you can complete this mission without having to steal it from Freedom. While you are here, also be sure to pick up another mission - Find the enhanced rifle. If you complete most if not all of the optional missions for Voronin you're like to become friends with Duty. Sadly though, this doesn't mean you can join the faction. It does mean that Petrenko (see below) will sell a wider selection of equipment - nowhere near as impressive equipment as Skinflint, though.
You may also wish to pick up the mission to kill a stalker called Vampire, although this will take you back into Dark Valley. The mission is likely to net you two unique weapons, the Noiseless Viper and Sniper Obokan (as loot you find) and you'll get a Fireball as a reward for completing it.
Just south of the HQ you can find Colonel Petrenko who can also provide an optional mission - he wants you to kill a stalker from the Freedom faction; since this isn't going to be popular with Freedom you should only pick up this mission if you don't care about them being your enemies. This mission ties in well with a mission you can pick up at the Army Warehouses, so you may wish to wait to pick up the mission until you're ready to move into that area. Petrenko will reward you with a PSZ-9Md Universal Protection suit.
| Mission: Meet the Guide & Meet with Doctor | Back to top |
Ok, Doc refers to you as Strelok... which must mean that... ok, ok, apparently your primary mission is to find and kill yourself. An easy task, I guess, and the game will in fact end if you kill yourself - however not really in a satisfactory way. There must be more to the story - I reckon that the stash at Pripyat, that Doc mentions, must be worth checking out. You'll be given the semi-optional mission Stash at Pripyat (again, semi-optional because you need to do this mission to gain access to the best endings the game has to offer).

 - @dawnrazor73